# Managed Private Cloud Mode (PCM)/Customer On-Premises Mode (OPM) Documentation
Andrew Lee (andrew@voiceit.io)
# Abstract
Please use the following documentation to install VoiceIt's PCM/OPM Solution inside your Kubernetes cluster. Although the following guide was written with AWS EKS in mind, these should work on other cloud providers as well as bare metal installations of Kubernetes.
This guide will cover Persistence, Deployments, and Services.
Beyond this, you can call the VoiceIt API directly from inside your Kubernetes cluster using the Kubernetes' DNS resolution capabilities (in which case, services are all you need), or to expose that service to the outside world using a cloud provider load balancer (or through an Ingress controller).
# Licensing Model
Before going into the specifics of the architecture, we would like to go over the licensing model of the containerized On-Premises Mode solution.
The microservices that comprise the PCM/OPM system check the state of the license once and hour. Hence, you will need to make sure you whitelist the domain https://licensing.voiceit.io. A failed request to the licensing server will result in the server shutting down.
# Assumptions
For this guide, we will be assuming you have already bootstrapped a working Kubernetes cluster on a cloud platform such as AWS, GCP, or Azure either on your own, or using the documentation at https://eks.voiceit.io/ (opens new window). The steps that comprise this documentation were conducted on AWS EKS. However, we have attempted to give platform agnostic directions when applicable.
This cluster must have external internet connectivity as VoiceIt microservices will need to periodically contact the Licensing Server.
You will also need an account on voiceit.io (opens new window) in order to access the Licenses (opens new window) and Files (opens new window) section of Dashboard to retrieve files.
Finally, this guide assumes your development machine is either using Linux or macOS. If you are using windows, Please use the Windows Subsystem for Linux in order to use some of the text extraction (grep, awk) techniques in this guide.
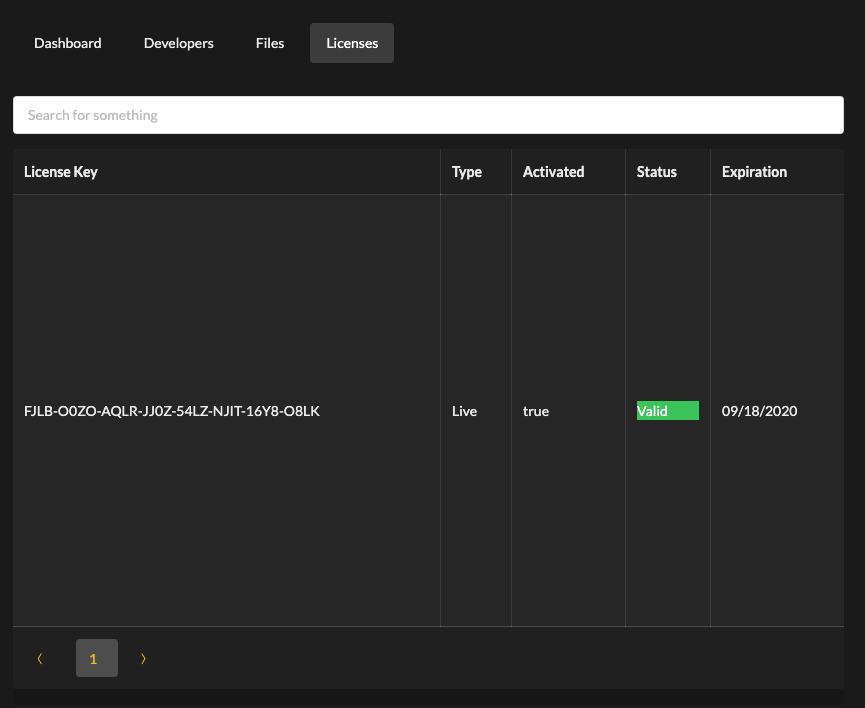
# Obtaining a License Key (Skip if you used Terraform)
Please contact VoiceIt to receive a license key, making sure that you notify us of any VoiceIt developer on your team (i.e. accounts that have logins to voiceit.io (opens new window)) you would like to have access to the license information on Dashboard (opens new window). Once the license key gets created, you should be able to view and download the initial Kubernetes configuration files needed to start the system directly from Dashboard (opens new window).
For the most part, most security sensitive environment variable fields (such as license key) have already been filled out for your convenience in these Kubernetes configuration files.
# Set Up VoiceIt PCM/OPM Namespace (Skip if you used Terraform)
We will create all PCM/OPM services inside the voiceit namespace. Please run:
kubectl create namespace voiceit
Until you are done setting up VoiceIt PCM/OPM Mode, you may want to change your named current context so that any action you take using kubectl automatically targets this namespace by default.
kubectl config set-context voiceit-context --namespace=voiceit \
--cluster=[cluster_name] \
--user=[user_name]
NOTE
You can find the values for [cluster_name] and [user_name] inside the file ~/.kube/config as contexts.[some_index].contexts.cluster and contexts.[some_index].contexts.user respectively.
kubectl config use-context voiceit-context
If you did not use our Terraform scripts, please create the following pull secrets for Docker Hub so you can pull images on your Kubernetes cluster.
kubectl create secret docker-registry voiceit-docker-hub --docker-server=https://index.docker.io/v1/ --docker-username="[docker_hub_username]" --docker-password="[docker_hub_password]" --docker-email="[docker_hub_email]" -n voiceit
NOTE
If you created the Docker Hub account with 2FA, you will need to create a Access Token, and pass that as the argument to --docker-password="[docker_hub_password]"
# Set Up MySQL Database (Skip if you used Terraform)
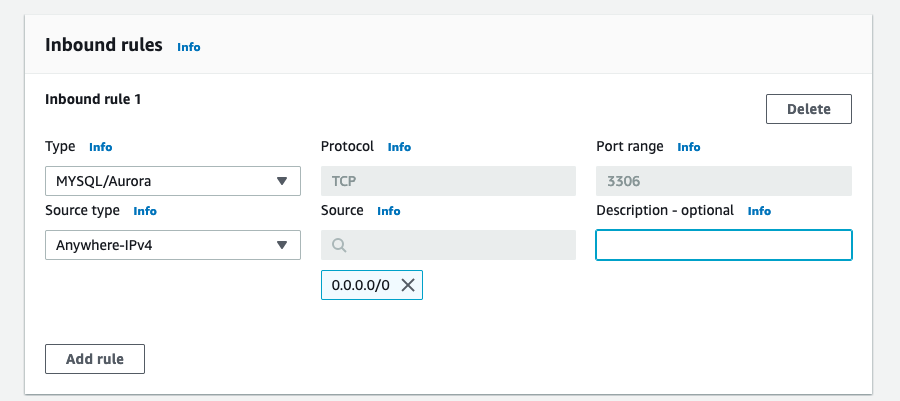
# Security Group
Go to VPC -> Security Groups in AWS Web Console
Create security group in the same VPC as EKS.
Create following Inbound rule
# RDS Cluster Parameter Group
- Go to Amazon RDS in the AWS Web Console.
- Select "Parameter groups" in the left hand column.
- "Create parameter group"
| Parameter group family | "aurora-mysql8.0" |
| Type | "DB Cluster Parameter Group" (NOT "DB Parameter group") |
| Group name | your choice |
| Description | VoiceIt PCM database options |
| Create |
Select the Parameter group, then click "Edit" and override the following values before saving:
character_set_server | utf8mb4 |
collation_server | utf8mb4_unicode_ci |
transaction_isolation | READ-COMMITTED |
innodb_rollback_on_timeout | 0 |
innodb_lock_wait_timeout | 50 |
Save
# RDS
Please create RDS instance in the same VPC as your EKS cluster.
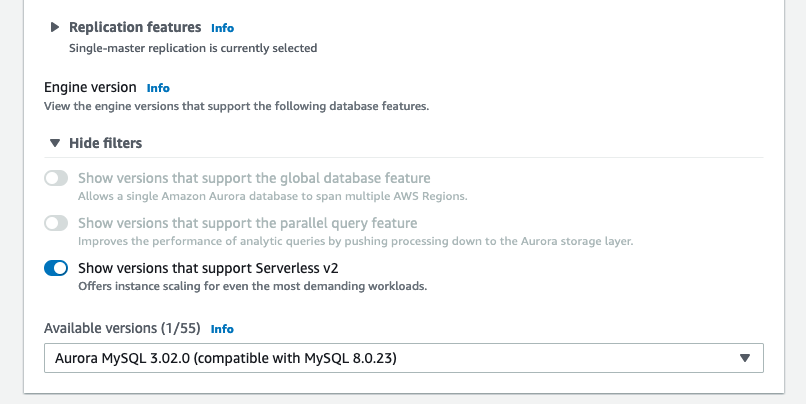
Standard Create/Amazon Aurora
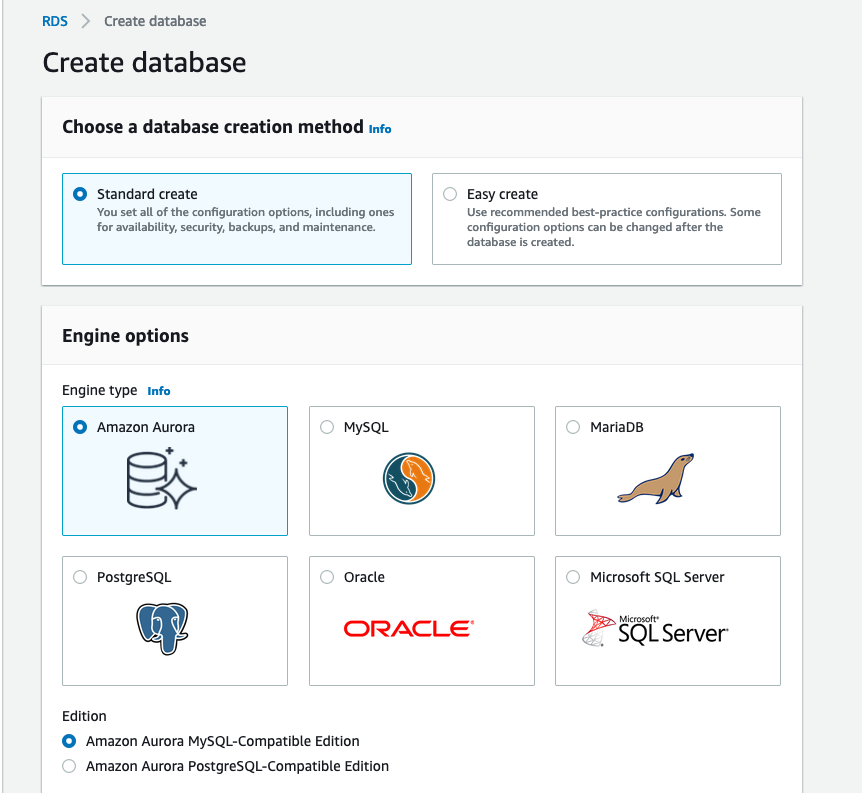
Aurora MySQL Serverless v2
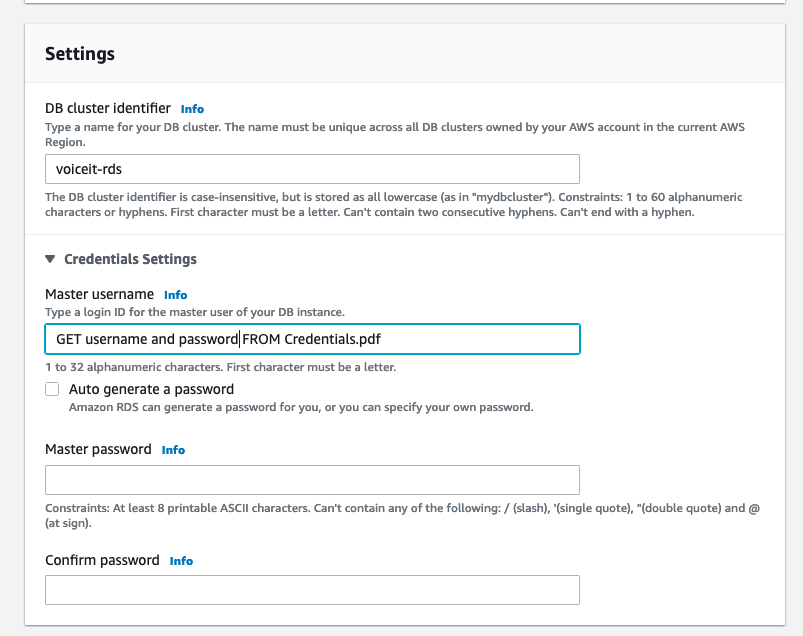
DB Cluster identifier/username/password (Get from Credentials.pdf which you can download from the Dashboard files section (opens new window))
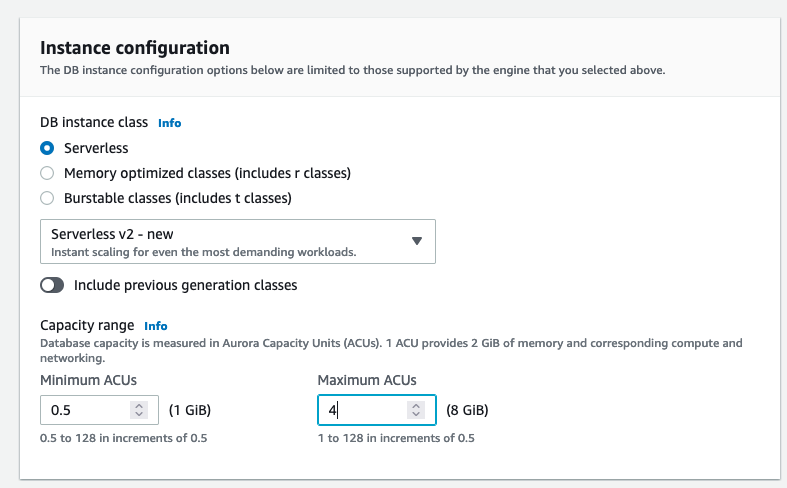
Capacity range 0.5,~ 4
Select same VPC as EKS
Public access = No
Additional configuration -> Initial database name = "vsit", DB cluster parameter group = select DB cluster parameter group created above
VPC Security group = security group from above
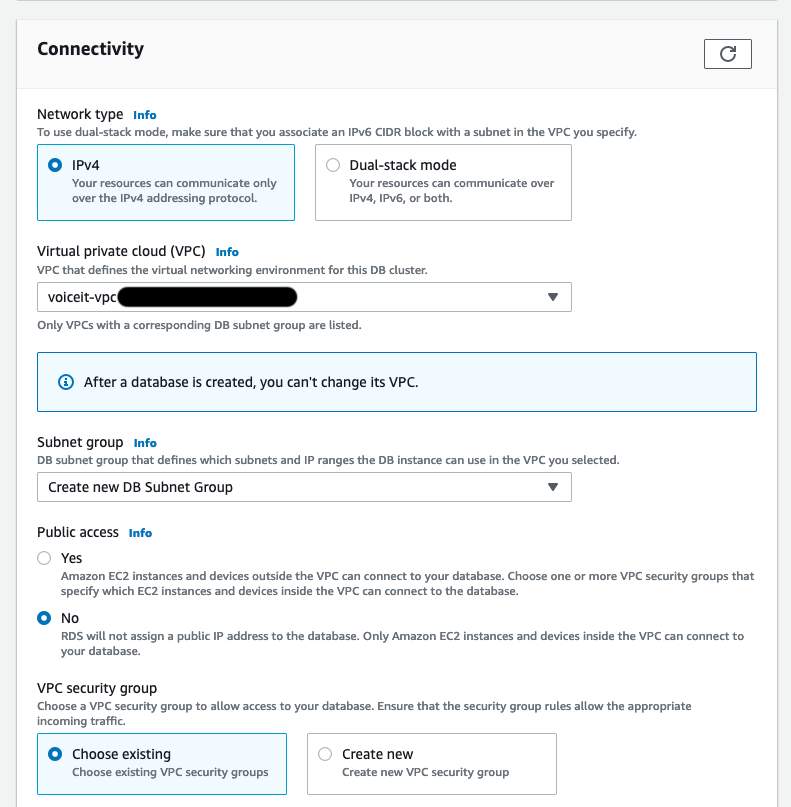
Create database
Please write down the writer address as you will need to replace all instances of MYSQL_DB_HOST environment variables in the .yaml files you will kubectl apply later on.
# VoiceIt Microservices
We are almost ready to set up the MySQL bootstrapping microservice
Before we get to that, we will want to enable EKS Fargate capabilities. If you intend to run all VoiceIt pods on traditional Kubernetes nodes, you can just ignore this step
# Set up Fargate
# Create Fargate Pod Execution Role
Please follow the guide at https://docs.aws.amazon.com/eks/latest/userguide/pod-execution-role.html (opens new window).
# Create Fargate profile
In AWS Web Console, please to to your EKS cluster, and create the following Fargate Profile via Compute > Add Fargate Profile:
| Name | voiceit |
| Pod execution role | role created above |
Next
| Namespace | voiceit |
Match labels -> Add label
Key: execution-environment | Value: fargate |
Next
Create
The MySQL microservice must be bootstrapped before launching API 2 and Dashboard.
# Initial Secrets
All sensitive information in the VoiceIt PCM/OPM system are generated by Licensing Server, and passed along to you as downloadable Kubernetes secrets file. You are free to use the secret files as is, but if you are using a cloud provider, they all have built in ways to encrypt secret values for an extra layer of of protection. For more information, please see (opens new window).
NEXT STEP
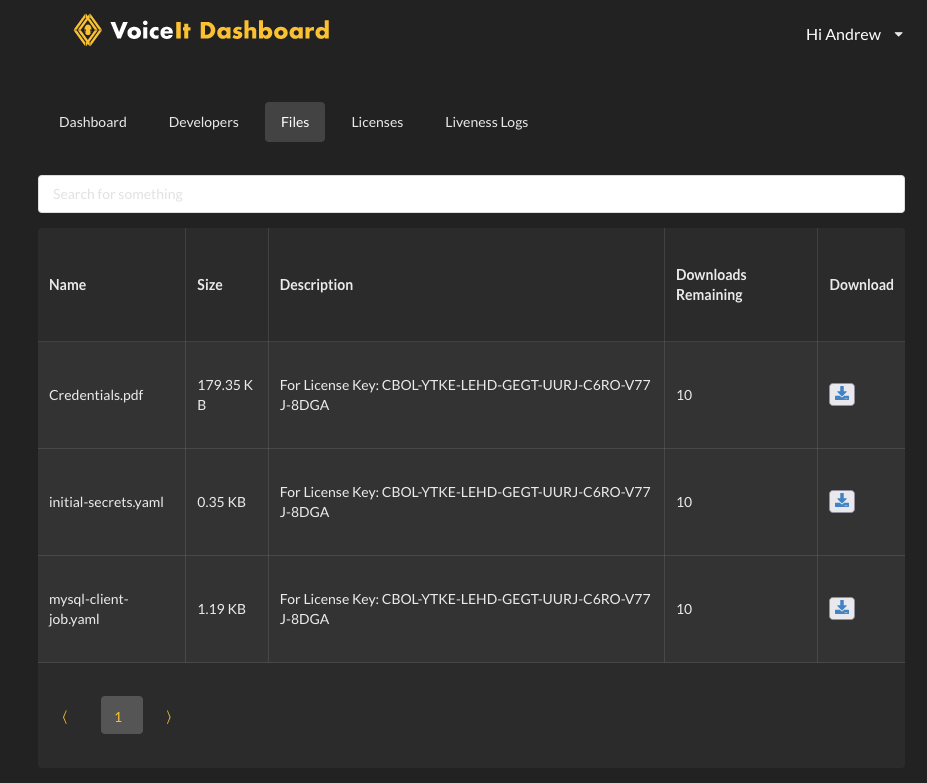
Please download the file initial-secrets.yaml from Dashboard (opens new window)
If you are using a Terraform created DocumentDB cluster (see https://eks.voiceit.io (opens new window), please replace the value for mongoURL with the connection string from DocumentDB. For example: mongoURL: "mongodb://username:password@voiceit-documentdb.cluster-auem06s1soxa.us-east-2.docdb.amazonaws.com:27017/?ssl=true&replicaSet=rs0&readPreference=secondaryPreferred&retryWrites=false")
and run the command kubectl apply -f initial-secrets.yaml
# MySQL
The blank RDS database created needs to be populated with the initial values.
NEXT STEP
Please download the file mysql-client-job.yaml and from Dashboard (opens new window), insert the value for MYSQL_DB_HOST withe the RDS writer endpoint and run the command kubectl apply -f mysql-client-job.yaml
Running the MySQL deployment for the first time, the vsit database gets populated with the generated credentials. However, after a successful bootstrap sequence, all developers who have access to the license key will see more files when reloading the Dashboard Files Tab (opens new window) page.
The rest of the files are Kubernetes configuration files that are used to finish setting up VoiceIt PCM/OPM Live mode with most environment variable fields filled out with credentials generated during the MySQL bootstrap stage for your convenience.
Before moving on, you need to ensure that the database was bootstrapped correctly.
NEXT STEP
Please download and install MySQL Workbench (opens new window).
# Other Secrets
NEXT STEP
Please download the file other-secrets.yaml from Dashboard (opens new window), and run the command kubectl patch secret/voiceit-secrets --patch-file other-secrets.yaml -n voiceit
# MongoDB
Please skip this step if you are using a Terraform created DocumentDB cluster (see https://eks.voiceit.io (opens new window). Furthermore, Terraform automatically sets up a t3a.large to run the MongoDB pod. If you plan to use DocumentDB, please go into AWS Web Console > EC2 > Auto Scaling Groups > eks-t3a-large..., and in "Group details > edit", change the desired capacity to "0" so you don't get charged for this one traditional node.
MongoDB was chosen for the logging persistence layer and the regular data persistence layers for services like Liveness Server and Translation Server due to its lack of schemas which makes it easy to create changes in logging and logging data that only need to exist in the producers and consumers of data (i.e. no more schema changes on tables that are hundreds of thousands of rows long).
Before going through the following step, please ensure that you have set up a large enough traditional node (t3a.large/t3.large) for the purpose as well as installed AWS EBS CSI driver (opens new window) onto your EKS Kubernetes cluster
Unlike MySQL which requires a bootstrap sequence and API calls to our licensing server to generate secure credentials to be inserted, you can use any valid MongoDB setup as long as it can be accessed by API 2 and Dashboard.
NEXT STEP
Please download the files mongodb-storage.yaml, mongodb-deployment.yaml and mongodb-service.yaml from Dashboard (opens new window), and run the command kubectl apply -f mongodb-storage.yaml && kubectl apply -f mongodb-deployment.yaml && kubectl apply -f mongodb-service.yaml
NOTE
Since logging is optional if you don't want to run MongoDB to get the ability to look at incoming API calls to API 2 inside Dashboard, you can run the following SQL Command in MySQL Workbench, and skip deploying MongoDB to your Kubernetes cluster:
UPDATE `vsit`.`vsit_developer` SET `TrackData` = '0';
Please beware that turning off logging removes an important set of tools for VoiceIt to support you if you run into issues. We strongly advise you to keep logging on at least during the development and QA testing stages of your development lifecycle.
The process above in the NEXT STEP section details the most primitive MongoDB setup using a single container using EBS persistence. However, we encourage you to set up a multi-node MongoDB cluster for better redundancy on your Kubernetes cluster, or pay a managed service provider like a MongoDB Atlas or AWS (DocumentDB) for better reliability.
If you do go with a different providers, they will give you new credentials, and you will need to edit the MONGODB_URL environment variables in API 2, Dashboard, Liveness Server, and Translation Server with the syntax: mongodb://username:password@url:port.
# AI Engines
VoiceIt also give you access to state-of-the-art neural net voice biometric engines deployed as microservices. These require a pod reaper to maintain engine performance by flushing RAM periodically.
NEXT STEP
Please download the files ai-engines-pod-reaper.yaml, siv3-deployment.yaml, siv4-deployment.yaml, siv3-service.yaml, siv4-service.yaml from Dashboard (opens new window), and run the command kubectl apply -f ai-engines-pod-reaper.yaml && kubectl apply -f siv3-deployment.yaml && kubectl apply -f siv4-deployment.yaml && kubectl apply -f siv3-service.yaml && kubectl apply -f siv4-service.yaml.
# API 2
NEXT STEP
Please download the file api2-deployment.yaml, api2-service.yaml, and api2-ingress.yaml from Dashboard (opens new window), replace the environment variable MYSQL_DB_HOST with the RDS writer endpoint, and run the command kubectl apply -f api2-deployment.yaml.
The above step will create pod(s) running API 2 inside of a deployment. If you are utilizing AWS EKS, you can use the file api2-ingress.yaml in Dashboard (opens new window) to set up a classic Classic Load Balancer which you can hook up to a Route53 subdomain.
Once you download the file, replace the phrase [INSERT_CERTIFICATE_MANAGER_ARN] with the ARN you can find in the Certificate Manager console in AWS Web Console for the domain name you want to use. After you apply that, you can use kubectl get ingress -n voiceit and look in the ADDRESS column to get the alias of the Application Load Balancer that was created in order to fill that information out in the Route53 console for a given subdomain.
If you need to run API 2 as an insecure service that is accessible from inside Kubernetes only, you can use the file siv3-service.yaml to translate the file api2-service.yaml to create a service that is internal to Kubernetes. You would use http rather than https to access API 2 if you set it up this way. If you have clients contacting API 2 from an external network route, you will need to utilize the Route53 -> ALB -> Pod way service definition we defined above instead.
NOTE
In order to run multiple instances of API 2, change the spec.replicas attribute in the deployment definition. As is explained in the license model section, you can only run as many nodes as is allowed by your license.
# Enable Speech-To-Text Services
Inside the API 2 deployment YAML file for Kubernetes, please make sure to replace either or both the [INSERT_GOOGLE_API_KEY] and/or [INSERT_MICROSOFT_API_KEY].
Furthermore, for Microsoft, you will need to also replace [INSERT_MICROSOFT_STT_BASE_URL] with the the URL for the service inside of Azure Cloud (For example, https://eastus.stt.speech.microsoft.com/speech/recognition/conversation/cognitiveservices/v1).
Once you change environment variables in the deployment file, you will need to restart API 2 via the command kubectl apply -f api2-deployment.yaml.
Then, go into MySQL Workbench and execute the following queries as needed:
To turn on Google STT services:
UPDATE `vsit`.`vsit_developer` SET `googleSTTEnabled` = '1';
To turn on Microsoft STT services:
UPDATE `vsit`.`vsit_developer` SET `microsoftSTTEnabled` = '1';
The environment variables will be used to make API Calls to a given speech-to-text provider.
Once these steps are completed, you will be able to enroll, verify, and identify using true content languages with speech-to-text services from Google and/or Microsoft.
In your requests to the API 2 microservice(s), you will send contentLanguage as en-US (or any other supported content language) instead of no-STT. For a list of all supported languages, please take a look at https://api.voiceit.io/#content-languages (opens new window).
# Dashboard
STOP
You will not be able to start the Dashboard microservice(s) unless logging is turned on and MongoDB is set up (see MongoDB documentation)
NEXT STEP
Please download the files dashboard-deployment.yaml, dashboard-service.yaml, and dashboard-ingress.yaml from Dashboard (opens new window).
Please replace the text [INSERT_API2_ENDPOINT] in dashboard-deployment.yaml with the Route 53 subdomain you set up to connect to API 2.
Also, please replace the environment variable MYSQL_DB_HOST with the RDS writer endpoint.
Finally, run the command kubectl apply -f dashboard-deployment.yaml
The above step will create pod(s) running Dashboard inside of a deployment. If you are utilizing AWS EKS, you can use the file dashboard-service.yaml in Dashboard (opens new window) and dashboard-ingress.yaml to set up a classic Application Load Balancer which you can hook up to a Route 53 subdomain.
Once you download the ingress file, replace the phrase [INSERT_CERTIFICATE_MANAGER_ARN] with the ARN you can find in the Certificate Manager console in AWS Web Console for the domain name you want to use. After you apply that, you can use kubectl get ingress -n voiceit and look in the ADDRESS column to get the alias of the Application Load Balancer (ALB) that was created in order to fill that information out in the Route 53 console for a given subdomain.
# Liveness Server
By default, we disable Liveness Services because it takes two extra backends (Translation Server and Liveness Server) to get up and running properly. If you need to use Liveness Services, please contact VoiceIt Support and we can enable it for your License.
Please note, after being enabled, you will need to add an additional environment variable inside the API 2 deployment file (api2-deployment.yaml) for LIVENESS_SERVER_URL which contains the root endpoint for Liveness Server.
# Translation Server
Translation Server is needed to create translations on the fly for Liveness Server when used with other content languages. It provides translations on the fly using Google Translate API, and saves that to MongoDB. But also serves a web GUI frontend which allows developers to manage translations, and even write their own custom ones that are more accurate then the ones returned by Google. Please contact VoiceIt a more in depth tutorial if you need to understand how to use this more, or how to use it in your own API's for on-the-fly localizations.
NEXT STEP
Please download the files translation-server-deployment.yaml, translation-server-ingress.yaml, and translation-server-service.yaml from Dashboard (opens new window).
Inside the Translation Server deployment YAML file for Kubernetes, please make sure to replace [INSERT_GOOGLE_API_KEY] with your Google Cloud API Key. Once you change environment variables in the deployment file, you will need to restart Translation Server via the command kubectl apply -f translation-server-deployment.yaml.
Finally, run the command kubectl apply -f translation-server-deployment.yaml && kubectl apply -f translation-server-service.yaml && kubectl apply -f translation-server-ingress.yaml
# Liveness Server
Liveness Server is needed to utilize VoiceIt Liveness services in Web SDK (opens new window), Android SDK (opens new window), and iOS SDK (opens new window).
Liveness Server itself will contact API 2 as part of the liveness call, so it will need the url of API 2.
NEXT STEP
Please download the files liveness-server-deployment.yaml, liveness-server-service.yaml, liveness-server-ingress.yaml from Dashboard (opens new window).
Inside the Liveness Server deployment YAML file for Kubernetes, please make sure to replace [INSERT_API2_ENDPOINT] with the API 2 endpoint you set up above. Once you change environment variables in the deployment file, you will need to restart Liveness Server via the command kubectl apply -f liveness-server-deployment.yaml.
Inside livensss-server-ingress.yaml, replace the phrase [INSERT_CERTIFICATE_MANAGER_ARN] with the ARN you can find in the Certificate Manager console in AWS Web Console for the domain name you want to use. After you apply that, you can use kubectl get ingress -n voiceit and look in the ADDRESS column to get the alias of the Application Load Balancer that was created in order to fill that information out in the Route53 console for a given subdomain.
Finally, run the command kubectl apply -f translation-server-deployment.yaml && kubectl apply -f translation-server-service.yaml && kubectl apply -f translation-server-ingress.yaml
After connecting the Liveness Server pod to an externally accessible endpoint such as "https://liveness.domain.tld", you will need to add the following environment variable inside of api2-deployment.yaml then run kubectl apply -f api2-deployment.yaml.
        env:
        - name: LIVENESS_SERVER_URL
          value: "https://liveness.domain.tld"
This is needed for GDPR compliance as it relates to data retention. This endpoint is used (along with the authentication variables LIVENESS_SERVER_ADMIN_USERNAME and LIVENESS_SERVER_ADMIN_PASSWORD) whenever API 2 deletes a user.
API 2 is responsible for deleting files related to API 2 logging, but if Liveness Services were used at any point, API 2 also needs to hit Liveness Server data deletion endpoint to ensure Liveness Server also deletes all logging data related to that user.
NOTE
If you do not add the LIVENESS_SERVER_URL while we have Liveness Services enabled for your License Key, API 2 will stay in a crash loop.
# Completion Summary
At this point, all microservices that comprise the VoiceIt On-Premises Mode system have been deployed. Inside your Kubernetes cluster, you can hit API 2 by the URL http://voiceit-api2:80 as the Service definition of API 2 allows Kubernetes DNS resolution to point the API request to the correct pod. Dashboard can also be accessed using http://voiceit-dashboard:80 if the request originates from an application running inside your Kubernetes cluster.
STOP
Please consider migrating both the MySQL and MongoDB from using our pods to managed services for better service uptime guarantees. In our own production SaaS cloud, we utilize AWS RDS for SQL persistence and MongoDB Atlas for MongoDB persistence.
# Performance Considerations
# General
Although we have provided some default resource constraints inside the pod specifications for the MySQL, API 2 and Dashboard microservices, here we will also go into more details about optimizing the performance of the VoiceIt On-Premises system.
# MySQL
You will never run more than one instance of the MySQL server. The default resource specification inside mysql-deployment.yaml will be good enough for up to four API 2 instances. Please consult with VoiceIt Support if you need to scale more instances of API 2.
As far as instance types, general purpose instance types should be used as memory optimized and storage optimized instance types add further costs without adding to the performance of the PCM/OPM system.
For maximum stability, we suggest using a managed cloud database service compatible with MySQL 5.7.28 clients.
# AI Engines
The AI Engines work best on memory optimized instnaces (like the EC2 R series).
# API 2
Although we have provided default values to work for most scenarios, generally speaking, API 2 scales fairly well as you add more CPU and RAM to the pods.
To maximize system resilience, we suggest running no less than two instances at any given time. For underlying instance types, please utilize general purpose or memory optimized instance types. We saw good results with the m5 instance types.
Running four instances of API 2 with the default values can handle up to five requests a second. Please consult with VoiceIt Support if you need to scale more instances of API 2.
# Dashboard
You will probably never need more than once instance of Dashboard up and running at any given time as this is a diagnostic tool to trace API calls to API 2. As such, the low level specification in this documentation should work fine for most installations. However, be careful if you want to lower the RAM requirements as it will most likely lead to OOM killed problems due to the Node backend requesting more RAM than is available to the pod.
However, if you have many users accessing Dashboard and start to see performance suffer, it may make sense to increase the resources allocated to the Dashboard pod or to scale up the number of replicas. Unlike API 2, running more instances of Dashboard will not be limited by your license node limitation (see license model).
# TLS Encryption In Depth
The following is a more in depth example on how to encrypt an EKS load balancing service.
First, go to the Certificate Management Console on AWS Web Console and make sure you have a registered domain name that is of Issued status. On that certificate, expand using the triangle and get the ARN related values for {region}, {user id}, and {id} as defined in the YAML file below.
Next will modify the API 2 ingress to say the following.
apiVersion: networking.k8s.io/v1
kind: Ingress
metadata:
  name: voiceit-api2-ingress
  namespace: "voiceit-prod"
  annotations:
    kubernetes.io/ingress.class: 'alb'
    alb.ingress.kubernetes.io/scheme: 'internet-facing'
    alb.ingress.kubernetes.io/target-type: 'ip'
    alb.ingress.kubernetes.io/listen-ports: '[{"HTTPS":443}]'
    alb.ingress.kubernetes.io/certificate-arn: 'arn:aws:acm:{region}:{user id}:certificate/{id}'
    alb.ingress.kubernetes.io/load-balancer-attributes: 'idle_timeout.timeout_seconds=120'
  labels:
    app: voiceit-api2
spec:
  rules:
  - http:
      paths:
      - path: /
        pathType: Prefix
        backend:
          service:
            name: voiceit-api2
            port:
              number: 443
Once you apply the above change to the service, you need to display the domain name of the application load balancer (ADDRESS in Kubernetes terms) by running the command kubectl get ingress/voiceit-api2-ingress -n voiceit.
Go back to AWS Web Console and go to Route 53. Under the domain name (under hosted zones), create a record set, set alias to yes, and enter in the above application balancer domain name.
Please read this article (opens new window) for more information on how to accomplish this.
# Future Roadmap
- Add supplemental documentation on how to connect an EKS cluster to an RDS instance
- Increase compliance with cloud native practices and configurations harnessing the full power of Kubernetes
- Add application level health and readiness checks
- Optimize performance/break apart bottlenecked systems into microservices
- New web interface to make system configurations more intuitive